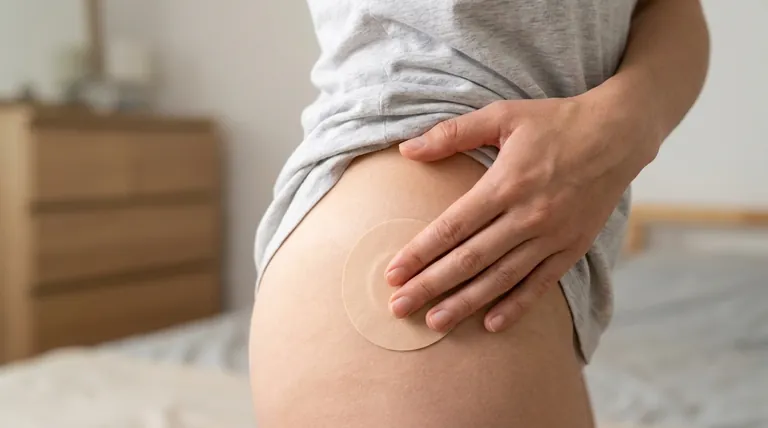
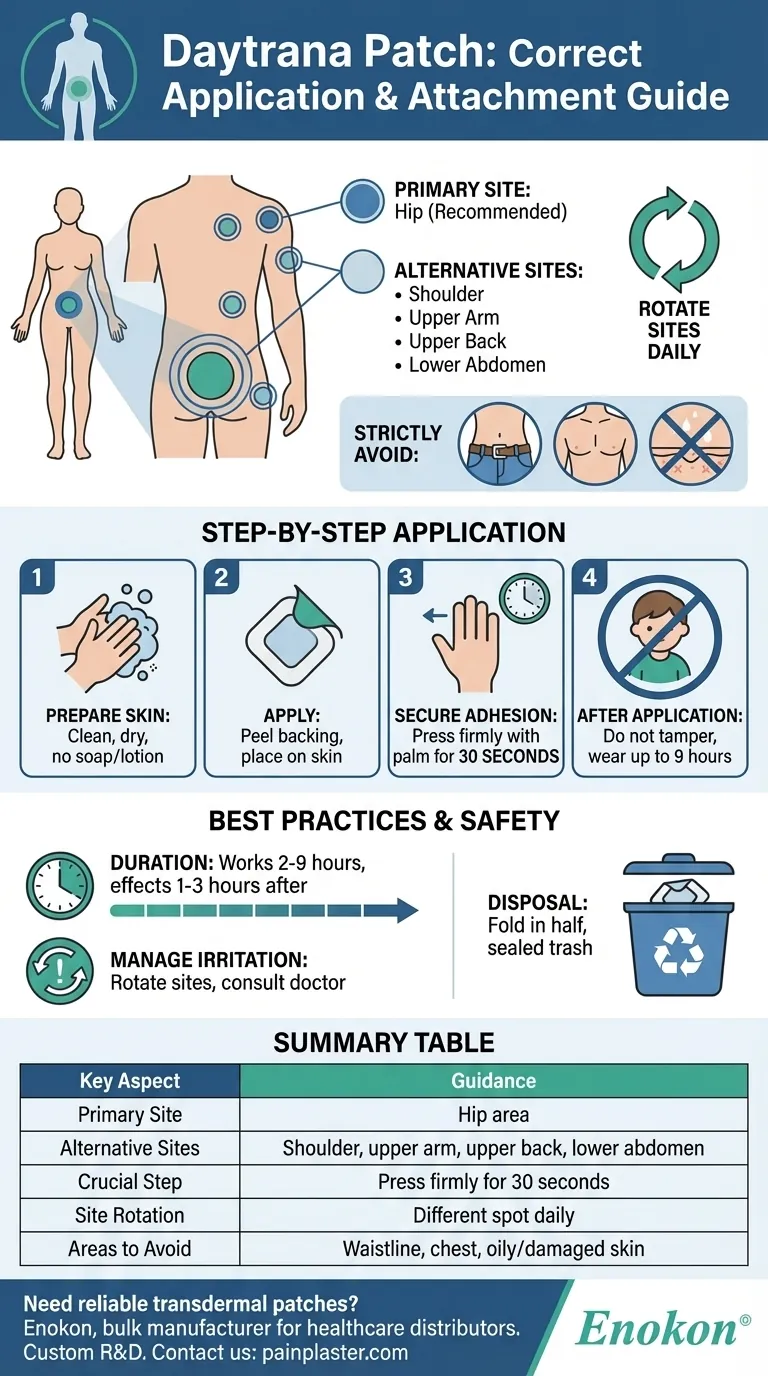
To apply the Daytrana patch correctly, place it on a clean, dry area of the hip, avoiding the waistline where clothing could rub it off. After removing the protective liner, press the patch firmly onto the skin with the palm of your hand for about 30 seconds to ensure the edges are sealed and it is fully attached.
The key to effective and safe use of the Daytrana patch is not just choosing the right location—primarily the hip—but also ensuring a secure bond to the skin and consistently rotating application sites to prevent irritation.
Selecting the Application Site
Choosing where to place the patch is the first step in ensuring consistent medication delivery throughout the day. The location impacts both absorption and the likelihood of the patch staying in place.
The Primary Recommended Site: The Hip
The hip area is the most commonly recommended location for the Daytrana patch. This site provides for efficient absorption of the medication and is less likely to be disturbed by clothing or daily activities compared to other areas.
Alternative Application Sites
While the hip is preferred, other locations can be used. These include the shoulder, upper arm, upper back (near the shoulder blade), or the lower abdomen (stomach). Consistently rotating between these approved sites is critical.
The Importance of Site Rotation
You should apply the patch to a different spot each day. Applying it to the same location repeatedly can cause skin irritation, redness, or sensitivity. A good practice is to alternate between the left and right hip daily.
Areas to Strictly Avoid
Never apply the patch to the waistline, as the friction from clothing can easily dislodge it. Do not apply it to the chest area or any skin that is oily, irritated, red, cut, or damaged in any way.
The Step-by-Step Application Process
Following a precise method ensures the patch adheres properly and delivers the correct dose of medication.
Step 1: Prepare the Skin
The chosen skin area must be completely clean and dry before application. Do not use any soaps, oils, lotions, or alcohol to clean the area, as these can leave a residue that prevents the patch from sticking.
Step 2: Open and Apply the Patch
Carefully peel the protective backing off the patch without touching the sticky, medicated side. Immediately place the patch onto the prepared skin area.
Step 3: Ensure Secure Adhesion
Use the palm of your hand to press the patch firmly in place for about 30 seconds. Make sure the edges are completely sealed to the skin. This pressure and warmth help activate the adhesive.
Step 4: After Application
Once applied, the patch should not be tampered with or played with. It is designed to be worn for up to nine hours.
Understanding Best Practices and Safety
Proper handling of the patch from application to disposal is essential for safety and effectiveness.
Timing and Duration
The Daytrana patch begins to work approximately two hours after it is applied. It can be worn for a maximum of nine hours, and its effects may continue for one to three hours after it has been removed.
Preventing Accidental Exposure and Disposal
When you remove a patch, it will still contain some medication. Fold the used patch in half so the sticky sides press together, sealing the medicated surface. Dispose of it in a lidded trash can where children or pets cannot access it.
Managing Skin Irritation
If redness or irritation occurs, ensure you are carefully rotating application sites. If the irritation persists or worsens, consult your healthcare provider. Never apply a new patch over irritated skin.
Making the Right Choice for Your Goal
Your specific concerns will guide which aspect of the application process you focus on most.
- If your primary focus is consistent medication delivery: Prioritize applying the patch to the hip and pressing firmly for 30 seconds to guarantee a secure seal.
- If your primary focus is avoiding skin irritation: Make a strict habit of rotating the application site each day, never using the same spot two days in a row.
- If your primary focus is safety for the patient and others: Ensure the patch is not tampered with during wear and is always folded and disposed of properly.
Following these guidelines will help ensure the medication is delivered safely and effectively.
Summary Table:
| Key Aspect | Guidance |
|---|---|
| Primary Site | Hip area |
| Alternative Sites | Shoulder, upper arm, upper back, lower abdomen |
| Crucial Step | Press firmly for 30 seconds to ensure adhesion |
| Site Rotation | Apply to a different spot each day to prevent irritation |
| Areas to Avoid | Waistline, chest, or any oily, cut, or irritated skin |
Need a reliable supplier for transdermal patches like Daytrana?
As Enokon, a bulk manufacturer of reliable transdermal patches and pain plasters, we provide healthcare and pharmaceutical distributors and brands with high-quality products and expert technical support. Benefit from our custom R&D and development expertise to create the precise patch solutions your patients need.
Contact our team today to discuss your requirements and partner with a trusted manufacturer.
Visual Guide
Related Products
- Herbal Medicated Anti Diarrhea Patch for Digestive Relief
- Menthol Gel Pain Relief Patch
- Hydra Gel Health Care Eye Patch
- Icy Hot Menthol Medicine Pain Relief Patch
- Cooling Fever Patches Color Change Cold Fever Patch
People Also Ask
- What are the proper procedures for patch removal and disposal? A Safety Guide to Prevent Accidental Exposure
- What should be done if a patch falls off or a dose is missed? Quick Fixes & Safety Tips
- What activities should be avoided while using this patch? Key Precautions for Safe & Effective Use
- What medical conditions should be reported before using this patch? Ensure Safe Use of Herbal Patches
- What should be avoided when using the patch? Key Safety Tips for Herbal Patch Users